Become familiar with the Actions panel
Photoshop includes several Actions - we'll learn how to make our own.
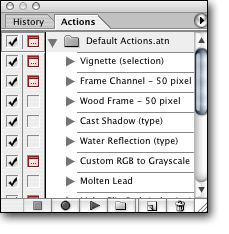
Figure 1.3
Once the image is opened, well be able to start recording an Action. Photoshop comes with several Actions pre-installed. These actions can be found in the Actions Panel. To open the Actions Panel, go to the top of the Program window and press: Window > Actions. Once youve done this, you should see the Actions panel. See figure 1.3 for an example.
As you can see, the default actions located in the Actions panel can perform several instructions. However, if you have a specific set of instructions you need to carry out on many images, these default Actions may not offer the exact solution. For that reason we’re going to create our own Action file.
Once you’ve found the Actions panel, you’ll notice the button bar at the bottom of the panel. There are 6 buttons. From left to right, these buttons perform the following tasks:
- Stop Recording
- Start Recording
- Play Action
- Create a New Folder (or Action Set)
- Create a New Action
- Delete an Action or a Folder (this button will delete what ever is highlighted in the above list)
Figure 1.4
The top part of the Actions panel is where you’ll find the list of Actions. Actions are just like files – they can be saved, imported, and can even be stored/grouped in folders. Let’s take a moment and create a new folder where our yet-to-be-created Action will reside.
Click on the ‘Folder’ icon. It’s the fourth button from the left. See figure 1.4 for an example.
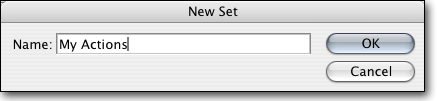
Figure 1.5
You should see a dialog box appear that will allow you to name your folder (or Action set). For the tutorial I’ll name my Action folder “My Actions.” See figure 1.5 for an example.
Now that we have a folder, we’re ready to create our first Action.