Recording the Action
In this section we'll record our Action
Figure 2.2
Now that the Action has been named and started, youll notice that the Record button is set to On. See figure 2.2 for an example.
It’s important to remember that whenever that record button is set to ‘On’ that every instruction you give the program is being recorded.
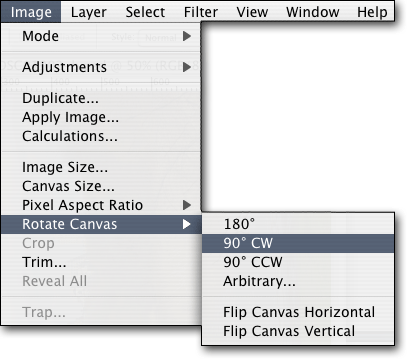
Figure 2.3
Okay, let’s record our Actions:
Step 1: This first thing were going to do is rotate the image 90 degrees clockwise. This will bring the image around to the right 90 degrees and level out the photograph. To do this, select Image on the program menu bar at the top of the screen, then Rotate Canvas and then 90 deg. CC. See figure 2.3 for an example.
Step 2: Now that the image is properly positioned, well enhance the contrast of the photo. To do this, select Image again from the top menu, and then select Adjustments and then Auto Contrast. Youll notice that this greatly enhances the color and contrast of the image.
Step 3:This is one of the more important steps. Now that were done giving the program instructions well need to stop recording. To do this, simply press the Stop button on the Actions panel. See figure 2.4 for an example.
Okay, now you should see the new and improved image. The image should be rotated and properly aligned and the contrast should be greatly improved.
Figure 2.4
In the next section, well get to test this Action.